插件描述:只有1kb的javascript 可以使用 HTML5 画布在您的网站上生成背景彩带动画
使用方法
在<body>和</ body>之间插入以下代码。
1 | <script src="dist/ribbon.min.js"></script> |
在标签</ body>之前建议,如下所示:
1 2 3 4 5 6 7 8 9 10 11 | <html><head> ...</head><body> ... ... ... <script src="dist/ribbon.min.js"></script></body></html> |
请不要在<head> </ head>中添加代码。
配置
size:功能区的大小,默认值:90。
alpha:行的不透明度(0~1),默认值:0.6。
zIndex:z空间的索引,默认值:-1。
例:
1 | <script type="text/javascript" size="150" alpha='0.3' zIndex="-2" src="dist/ribbon.min.js"></script> |
将脚本节点上的配置设置为属性。 所有配置都有默认值,您可以选择设置其中任何一个,或者不设置任何配置。
js中参数设置1:
1 2 3 4 5 6 7 8 9 10 11 12 13 14 15 16 17 18 19 20 21 22 | this._options = { // 色带HSL饱和度 colorSaturation: "80%", // 色带HSL亮度量 colorBrightness: "60%", // 带状颜色不透明度 colorAlpha: 0.65, // 在HSL颜色空间中循环显示颜色的速度有多快 colorCycleSpeed: 6, // 从哪一侧开始Y轴 (top|min, middle|center, bottom|max, random) verticalPosition: "center", // 到达屏幕另一侧的速度有多快 horizontalSpeed: 200, // 在任何给定时间,屏幕上会保留多少条带 ribbonCount: 3, // 添加笔划以及色带填充颜色 strokeSize: 0, // 通过页面滚动上的因子垂直移动色带 parallaxAmount: -0.5, // 随着时间的推移,为每个功能区添加动画效果 animateSections: true}; |
参数设置2:
1 2 3 4 5 6 7 8 9 10 11 12 13 14 15 | this._canvas = document.createElement("canvas");this._canvas.style["display"] = "block";this._canvas.style["position"] = "fixed";this._canvas.style["margin"] = "0";this._canvas.style["padding"] = "0";this._canvas.style["border"] = "0";this._canvas.style["outline"] = "0";this._canvas.style["left"] = "0";this._canvas.style["top"] = "0";this._canvas.style["width"] = "100%";this._canvas.style["height"] = "100%";this._canvas.style["z-index"] = "-1";this._canvas.id = "bgCanvas";this._canvas.style["background-color"]="#1f1f1f";this._onResize(); |
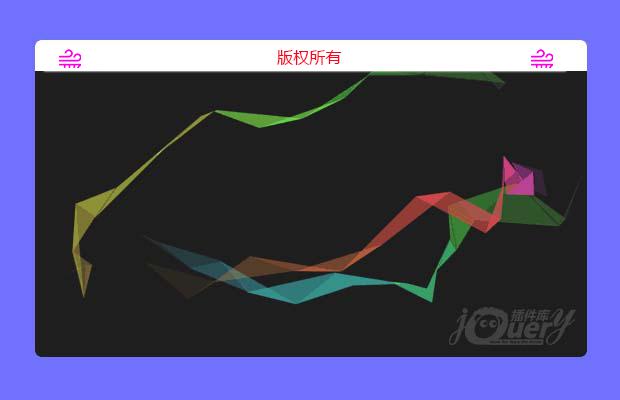
通过设置这些参数可以控制背景彩带的宽度高度位置等, github原插件是用户点击随机出现, 这个省略了点击, 直接随机生成3条彩带
特别申明:
本站所有资源都是由网友投稿发布,或转载各大下载站,请自行检测软件的完整性!
本站所有资源仅供学习与参考,请勿用于商业用途,否则产生的一切后果将由您自己承担!
如有侵权请联系我们删除下架,联系方式:lei1294551502@163.com
- 上一个特效: 好看的动画切换,底部带进度条
- 下一个特效: 仿某支付网模板