插件描述:这只是一个简单的编辑器,拥有插入表情,插入行块功能,支持IE9+,不依jQuery库
更新时间:2018/6/25 上午10:29:45
更新说明:添加了插入内容时可附带数据,该数据可在获取内容时一并返回,修复了谷歌浏览器有时换行失败的问题。
**这只是一个简单的编辑器,拥有插入表情,插入行块功能,支持IE9+**
1 | 演示网址:/ |
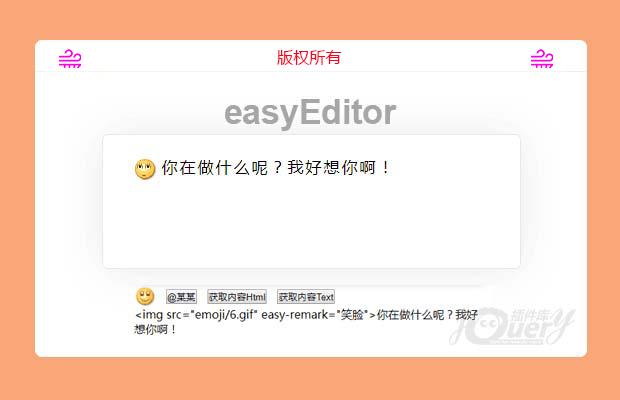
easyEditor
首先你需要引入css与JS
1 | <script src="js/easyEditor.js"></script> |
html你只需要一个div
1 | <div id="editor" style="width:500px;height:300px;"></div> |
我们需要实例化
1 | var editor = easyEditor('editor'); |
如果你需要placeholder
1 2 3 4 5 | /*** @param {string} placeholder实现**/editor.placeholder(str); |
可以使用js关闭placeholder
1 | editor.closePlaceholder(); |
插入表情
1 2 3 4 5 6 7 8 9 10 11 12 13 14 15 16 17 18 | /** * @param {object} opt * @param {string} opt.src 表情路径 * @param {string} opt.remark 表情说明 * @param {object} opt.data 表情携带的数据,在getContent方法里面会按插入表情的顺序放回 * @param {function} opt.afterInsert 插入后的回调函数 * */editor.insertEmoji({ src: 'emoji/1.gif', remark: '笑脸', data: { id: 12 }, afterInsert: function() { //do something }}); |
插入行块
1 2 3 4 5 6 7 8 9 10 11 12 13 14 15 16 17 18 19 20 21 22 23 24 25 26 27 28 29 30 31 32 33 | * @param { object}opt * @param { string }opt.text 文字 * @param { string }opt.color 文字颜色 * @param { object }opt.data 行块携带的数据, 在getContent方法里面会按插入行块的顺序放回 * @param { function }opt.afterInsert 插入后的回调函数 * * / editor.insertBlock({ text: '@somebody', color: '#f00', data: { id: 123 }, afterInsert: function() { //do something }}); |
获取编辑器里面的text
1 2 3 4 5 6 7 8 9 10 11 12 13 14 15 16 17 18 19 20 | /*** @param {object} opt** @param {string} opt.emojiSign 表情的分隔符(默认为 |)* @param {array} opt.emojiSign 表情的分隔符(默认为 ['|','|'])** @param {string} opt.blockSign 行块的分隔符(默认为 |)* @param {array} opt.blockSign 行块的分隔符(默认为 ['|','|'])** emojiSign与blockSign接受字符串或者数组,如果是字符串则自动转换成内容一样长度为2的数组* 例如 emojiSign = '|' 则或者的内容两边都为 |笑脸|* 如果 emojiSign = ['[',']'] 则获取的内容为 [笑脸]* 如果数组长度大于2,最终只会获取前两位的内容当成分隔符** blockSign同上*/var myhtml = editor.getContent({ emojiSign : ['[',']'], blockSign : '%%',}); |
聚焦
1 | editor.focus(); |
失焦
1 | editor.blur(); |
光标定位最前面、最后面
1 2 3 4 5 | /*** @param {string} position 仅仅支持 'start' 或者 'end'**/editor.setPosition(position); |
选中所有内容
1 | editor.selectAll(); |
删除选中内容
1 | editor.clearSelect(); |
删除所有内容
1 | editor.clearAll(); |
添加换行
1 | editor.changeLine(); |
更新时间:2018/5/29 上午9:27:32
更新说明:修改了MD文档,修复了光标获取不正确,考虑了更多用户的操作,新增API(具体请看MD文档)
首先你需要引入
1 2 | <link rel="stylesheet" href="css/easyEditor.css" /><script src="js/easyEditor.js"></script> |
你只需要一个div
1 | <div id="editor" style="width:500px;height:300px;"></div> |
我们需要实例化
1 | editor = easyEditor('editor'); |
1 2 3 4 5 6 7 8 9 10 11 12 13 14 15 16 17 18 19 20 21 22 23 24 25 26 27 28 29 30 31 32 33 34 35 36 37 38 39 40 41 42 43 44 45 46 47 48 49 50 51 52 53 54 55 56 57 58 59 60 61 62 63 64 65 66 67 68 69 70 71 72 73 74 75 76 77 78 79 80 81 82 83 84 85 86 87 88 89 | //表情 var emojiBtn = document.getElementById('emoji_btn');var emojiBox = document.getElementById('emoji_list');var emojiList = emojiBox.getElementsByTagName('img');//揠定事件添加表情for (var i = 0; i < emojiList.length; i++) { addEvent(emojiList[i], 'click', function() { var src = this.getAttribute('src'); editor.insertEmoji({ src: src, remark: '笑脸' }); //添加表情 emojiBox.style.display = 'none'; });}//At人var atBtn = document.getElementById('atBtn');addEvent(atBtn, 'click', function() { //添加At人 editor.insertBlock({ text: '@某某', color: '#f00' });});//?取textvar showBox = document.getElementById('show');var textBtn = document.getElementById('getTextBtn');addEvent(textBtn, 'click', function() { showBox.innerHTML = htmlEncode(editor.getContent({ emojiSign: '|', //表情分隔符 blockSign: '%' //行块分隔符 }));});//聚焦var focusBtn = document.getElementById('focusBtn');addEvent(focusBtn, 'click', function() { editor.focus();});//失焦var blurBtn = document.getElementById('blurBtn');addEvent(blurBtn, 'click', function() { editor.blur();});//光标定位前面var setPositionStartBtn = document.getElementById('setPositionStartBtn');addEvent(setPositionStartBtn, 'click', function() { editor.setPosition('start');});//光标定位后面var setPositionEndBtn = document.getElementById('setPositionEndBtn');addEvent(setPositionEndBtn, 'click', function() { editor.setPosition('end');});//选中所有内容var selectAllBtn = document.getElementById('selectAllBtn');addEvent(selectAllBtn, 'click', function() { editor.selectAll();});//删除选中内容var clearSelectBtn = document.getElementById('clearSelectBtn');addEvent(clearSelectBtn, 'click', function() { editor.clearSelect();});//删除所有内容var clearAllBtn = document.getElementById('clearAllBtn');addEvent(clearAllBtn, 'click', function() { editor.clearAll();});//换行var changeLineBtn = document.getElementById('changeLineBtn');addEvent(changeLineBtn, 'click', function() { editor.changeLine();});//添加placeholdervar placeholderBtn = document.getElementById('placeholderBtn');addEvent(placeholderBtn, 'click', function() { editor.placeholder('我们从这里开始...');}); |
更新时间:2017/12/25 下午2:20:05
更新说明:支持IE9,修改了md文档的描述,新增placeholder功能
easyEditor
首先你需要引入css与JS
1 2 | <link rel="stylesheet" href="css/easyEditor.css" /><script src="js/easyEditor.js"></script> |
html你只需要一个div
1 | <div id="editor" style="width:500px;height:300px;"></div> |
我们需要实例化
1 | var editor = new EasyEditor('editor'); |
插入表情
1 2 3 4 5 6 7 8 9 10 11 12 13 14 15 | /** * @desc 插入表情方法 * @param {object} opt * @param {string} opt.src 表情路径 * @param {string} opt.remark 表情说明 * @param {function} opt.afterInsert 插入后的回调函数 * */editor.insertEmoji({ src: 'emoji/1.gif', remark: '笑脸', afterInsert: function() { //do something }}); |
插入行块
1 2 3 4 5 6 7 8 9 10 11 12 13 14 15 16 | /** * @desc 插入行块方法 * @param {object} opt * @param {string} opt.text 文字 * @param {string} opt.color 文字颜色 * @param {function} opt.afterInsert 插入后的回调函数 * */editor.insertBlock({ text: '@somebody', color: '#f00', afterInsert: function() { //do something }}); |
获取编辑器里面的html
1 | var myhtml = editor.getContent(false); |
获取编辑器里面的text
1 | var mytext = editor.getContent(true); |
属性
1 2 3 | editor.sel; // selection 对象editor.ran; // range 对象editor.obj; // 编辑器对象(即文中id为editor的div); |
特别申明:
本站所有资源都是由网友投稿发布,或转载各大下载站,请自行检测软件的完整性!
本站所有资源仅供学习与参考,请勿用于商业用途,否则产生的一切后果将由您自己承担!
如有侵权请联系我们删除下架,联系方式:lei1294551502@163.com
- 上一个特效: jquery移动端消除游戏
- 下一个特效: jQuery信息提示插件jQuery FmHelp