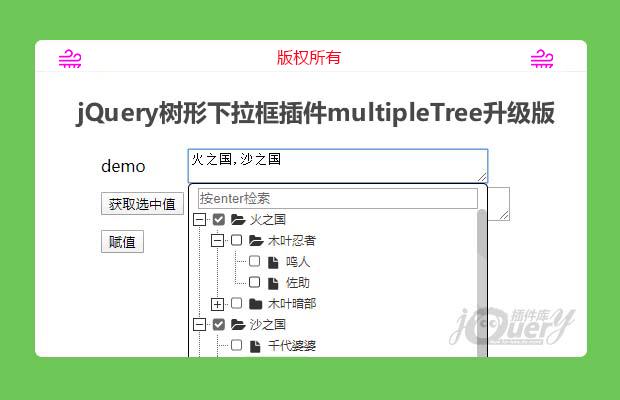
插件描述:tree是基于jqueryztree开发的树形下拉选择框插件,支持ie8+谷歌,火狐,360等浏览器(multipleTree升级版)
更新时间:2020-09-26 00:48:20
更新说明:新增销毁方法
更新时间:2019-12-31 23:46:50
jquery 树形下拉框插件(jquery tree drop box plugin)
TreeSelect,ztree开发的树形下拉选择框插件,支持ie8+,谷歌,火狐,360等浏览器
现在升级2.0名字由原来的DrawMultipleTree改为TreeSelect.js
api更加丰富。结构更加清晰
TreeSelect有如下主要特点(has the following main features)
- 兼容ie8以及各大主流浏览器
- 低侵入式使用
- 使用简单方便
- 继承了ztree高效渲染
使用方法
1. 引入jquery,ztree,TreeSelect等js和css文件
1 2 3 4 5 6 7 8 9 10 11 12 13 14 15 16 17 18 19 20 21 22 23 24 25 26 27 28 29 30 31 32 33 34 35 36 37 38 39 40 41 42 43 44 45 46 | <meta charset="UTF-8"><meta http-equiv="Content-Type" content="text/html; charset=utf-8" /><html><head> <title>$Title$</title> <link type="text/css" rel="stylesheet" href="css/demo.css"> <link type="text/css" rel="stylesheet" href="css/metroStyle/metroStyle.css"> <script src="js/jquery-1.11.2.min.js"></script> <script type="text/javascript" src="js/jquery.ztree.all.js"></script> <script type="text/javascript" src="treeSelect.2.0.js"></script> <script> </script> <script type="text/javascript"> /*节点列表(这里演示的是非异步方式的实现)*/ var zNodes = [ {id: 1, pId: 0, name: "火之国", open: true}, {id: 11, pId: 1, name: "木叶忍者", open: true }, {id: 111, pId: 11, name: "鸣人" }, {id: 112, pId: 11, name: "佐助"}, {id: 12, pId: 1, name: "木叶暗部" }, {id: 121, pId: 12, name: "鼬"}, {id: 122, pId: 12, name: "卡卡西"}, {id: 2, pId: 0, name: "沙之国", open: true}, {id: 21, pId: 2, name: "千代婆婆"}, {id: 26, pId: 2, name: "我爱罗"} , {id: 22, pId: 2, name: "沙之国忍者", open: true}, {id: 221, pId: 22, name: "手鞠"}, {id: 222, pId: 22, name: "勘九郎"}, {id: 3, pId: 0, name: "水之国"}, {id: 4, pId: 0, name: "土之国"} ]; /*注册下拉树方法也很简单*/ $(document).ready(function () { $("textarea").treeSelect({ zNodes: zNodes }); }); //--> </script></head><body style= "width: 1080px ;margin: 0 auto" ><br><!--在此元素上进行渲染下拉树--><textarea style="width: 300px" checks="1,11,2,23" type="text" readonly></textarea></body></html> |
2.异步加载配置实例async example
1 2 3 4 5 6 |
3.配置文件详解
**setting file detailed explanation**
1 2 3 4 5 6 7 8 9 10 11 12 13 14 15 16 17 | var options = { async: { enable: true, url: "异步加载url地址" }, chkStyle: "radio", /*radio:单选模式(Radio mode),checkbox:多选模式(checkbox mode),默认为多选*/ radioType: "all", /*all:整个树只能有一个选中,level:在每一级节点范围内当做一个分组*/ height: 433, /*容器高度默认200px*/ callback: { onCheck: function() {} /*选中事件的回调*/ }, direction: "auto" /* up向上,down向下,auto自动适应 默认auto*/ } |
4.api列表
获取选中文本get selected text value
1 2 | var obj=$("#yourContentId").treeSelect(options);obj.text(); |
获取选中值
1 2 | var obj=$("#yourContentId").treeSelect(options);obj.val(); |
js给组件赋值
1 2 | var obj=$("#yourContentId").treeSelect(options);obj.val([1,2,3,4,5,6,7]); |
默认选中值
方式1:
通过给dom元素设置属性checks来进行设置,格式为:checks="1,2,3,4,5"
例如:
1 2 | <textarea style="width: 300px;overflow:hidden;" **checks** ="1,11,2,23" type="text" readonly></textarea> |
方式2:
通过optios配置实现配置项为:checks
例如:
1 | $("#yourContentId").treeSelect({checks:[1,2,3],.....}); |
特别申明:
本站所有资源都是由网友投稿发布,或转载各大下载站,请自行检测软件的完整性!
本站所有资源仅供学习与参考,请勿用于商业用途,否则产生的一切后果将由您自己承担!
如有侵权请联系我们删除下架,联系方式:lei1294551502@163.com
- 上一个特效: 原生js实现的分页插件(原创)
- 下一个特效: jQuery bootstraps响应式设计类网站模板